It seems to be the status quo. I am down in material, and fighting to get even. Against a good player, unless there is a major lapse of judgment, a one-piece advantage is a won game. But, winning players do commit blunders. It is up to the losing player to tread water, and hope for the best.
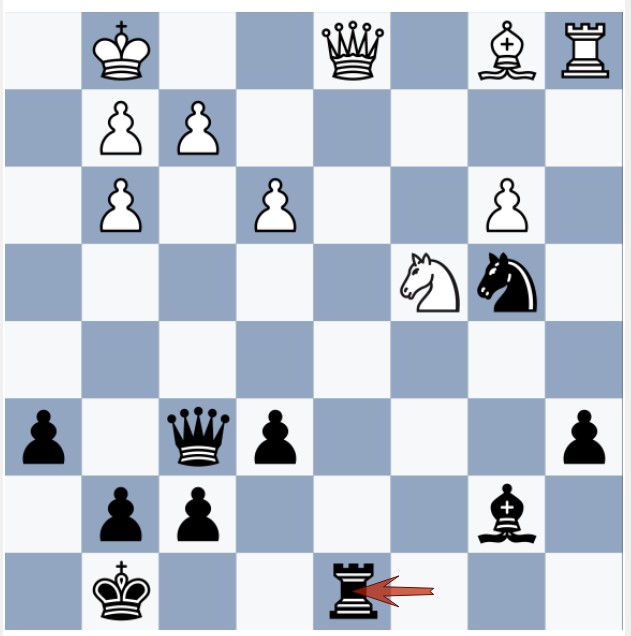
I am a minor piece down, having lost a knight en prise. Now, 23.Qc4+ and Black could have just moved his King to h8. Instead, Black played 23...Re6. I have already planned to move my rook up to the d5 square however Black responds, but 23...Re6 makes my life easier. Why move the rook into a pin? Why take away a defender of the bishop on f5 when it was quite obvious that 24.Rd5 and 25.Rf1 were coming?
So, 24.Rd5 attacking the Black Queen and the bishop by extension. Black thought for a while, and decided to play 24...Qf4. This line seems worse than 24...Qf6 even if there was 25.g4 in the works.
Naturally, 25.Rf1 followed, doubling up on the bishop on f5. It looked like the bishop was lost at this point. Black's losing the bishop would have resulted in equal material, not necessarily a lost game, but Black had other ideas. Alas, 25...Qf1?
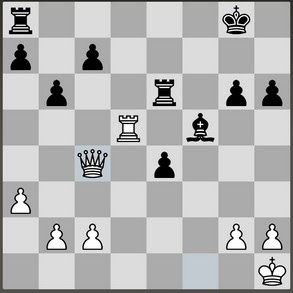
26.Qf1 g6 27.Qc4 R(8)e8 28.Rd7 e3 29.Qc7 (see below)
From here on, more bad news for Black. Here we are at the well-known mating net where the beleaguered king is hemmed in at the corner, and attackers on the seventh rank. Black doubled up on the f7 square with 29... Rf6. It was just a matter of technique for White to win via 30.Rg7+ Kf8 31.Rh7